Tag: natural

  • Virus Fighting Gargle Rinse

    Virus Fighting Gargle Rinse


    Last year when I started to feel like I was getting a cold, a friend suggested that I gargle with oregano oil. I was a little skeptical that it would help, but I was willing to give it a try! To my amazement the sore throat never developed into more than a little scratchy feeling. The next day I was completely back to normal because luckily I had caught it right in the beginning!!


    The only down side is that when gargling with pretty concentrated oregano oil, if you get a little too zealous it sprays onto your face it can really burn!


    Although the oregano oil by itself is one option, Alex at Digprimal.com has an even better recipe to use when you start to get a sore throat or feel run down. Since she works in a hospital it is very important for her to catch and get rid of any viruses that might want to take hold.


    {Alex is an anesthesiology resident with a passion for a whole foods and a holistic approach to health.  She’s the co-creator of the Healthy Hormones Group Program which helps women reclaim their adrenal, hormonal, and neurotransmitter balance. She also runs her blog, digprimal.com, which is all about natural living, DIY-ing, and fueling your body with nutrient dense food.  She lives in Chicago with her husband and two adorable (and goofy) cats.}


    Check out today’s guest blog post by Alex —>

    ————————————————————————–


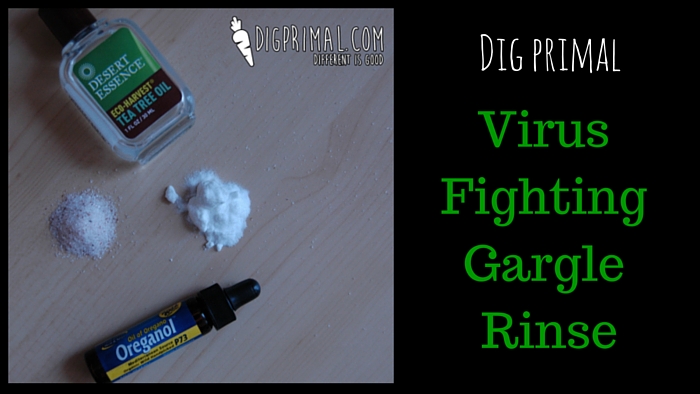
    Virus Fighting Gargle Rinse


    This recipe is what I reach for when I start to feel any sort of discomfort/scratchy-ness in the back of my throat or when I start to cough.  I do it up to 3 times per day the second I start to feel symptoms and, in my personal experience, it generally helps me from developing the full blown version of whatever was brewing.


    Ingredients:

    Steps:

    1.  Place your warm water into a large mug.
    2. Add in your salt and baking soda, then stir until dissolved.
    3. Add in your oregano oil and tea tree oil and mix thoroughly. (The oil will not want to mix with the water so you may have to stir several times throughout the process.)


    I use this recipe most often as a gargle but I’ve also had quite a bit of success when I’ve used it in a Neti Pot.


    We hope that this helps you out during the long winter months!


  • Chaga Hot Chocolate

    Chaga Hot Chocolate


    Chaga mushrooms are a type of medicinal mushroom known as the Siberian Gift to the Gods! They grow on trees and are extremely hard and rigid as compared to most types of mushrooms.   They are consumed by being ground into a powder and can then be made into a delicious beverage.


    We all know mushrooms are a superfood but these are like mushrooms on steroids! They are a very dense source of minerals including calcium, iron, manganese. They are also great for detox as they support the kidneys and liver.  A mid-afternoon chaga tea or hot chocolate can give you a boost in energy while supporting the adrenal glands because of the high mineral content.


    As if those weren’t enough benefits to want to try this magical mushroom, they also support digestion and are a rich source of pantothenic acid, riboflavin, and niacin. Chaga mushrooms have been used in ancient cultures for 100s of years and people who consume chaga mushrooms on a regular basis are said to live 85-100 years old.


    If ground up mushroom powder does not sound that appetizing, it is actually quite delicious when made into this hot chocolate because the chaga powder has somewhat of a caramel flavor! Think Starbucks Salted Caramel Hot Chocolate! (a hippy nutritious version)


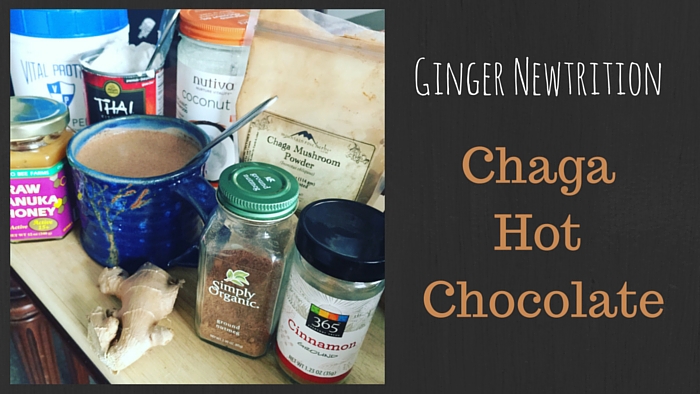
    Chaga Hot Chocolate

    2 Tbsp chaga powder

    2 Tbsp cacao powder

    1 Tbsp coconut oil (or as desired)

    1 tsp up to 1 Tbsp raw manuka honey (or as desired)

    ¼-1/3 cup of coconut milk

    ½ inch knob of fresh ginger

    1 Tbsp collagen powder

    1 tsp cinnamon (to taste)

    ½-1 tsp nutmeg (to taste)

    Sprinkle of pink sea salt


    Add chaga powder and cacao powder to the bottom of mug. Fill mug ¾ full with hot water. Melt coconut oil into hot water. Add honey and stir together. Put coconut milk, ginger, collagen powder, cinnamon, nutmeg into a blender (we have a Vitamix) that can handle hot beverages (not all of them can, be aware of exploding hot drinks!!). Pour the liquid that you have mixed together in your mug into the blender. Blend on high until well blended and frothy. Pour into your mug and top with a sprinkle of pink sea salt if desired.


    Enjoy!!!


  • Warm Apple Slices with Coconut Cream

    Warm Apple Slices with Coconut Cream


    Apple pie has always been my favorite dessert during the holidays.  I rarely have the time or patience to make a gluten-free apple pie, so this is my busy mom’s version of apple pie.  There are no excuses when it comes to this recipe because this is the simplest dessert ever!  Want something sweet after dinner? You can easily throw this together without much preparation (you just need to have coconut milk in the refrigerator!).


    In my practice we try to avoid deprivation. Instead we find a way to upgrade the foods that we lean on for comfort.  If you usually have ice-cream or cookies for dessert, try something like this instead!


    Warm Apple Slices with Coconut Cream

    Makes 2 servings

    1 can coconut milk, refrigerated for several hours

    1 teaspoon coconut oil

    2 apples, cored and sliced

    1 teaspoon raw honey

    1 teaspoon cinnamon

    1/2 teaspoon nutmeg


    Place a can of coconut milk in the refrigerator for several hours. The coconut milk fats will harden. Scoop this cream off of the top.


    COMBINE THE INGREDIENTS. Add coconut oil to a sauté pan over medium heat. Add the apple slices. Warm for 3 to 5 minutes. Transfer to two serving bowls. Top with coconut cream (the hardened coconut milk fat), raw honey, cinnamon, and nutmeg.


    Enjoy!


    Photo credit: Primal Palate

  • Elimination Diet Basics

    Elimination Diet Basics


    Unfortunately, intolerances and food sensitivities are common in today’s world. I think this is really obvious when you go to a restaurant. A little over 10 years ago I was a waitress and things were quite different. The menus did not list gluten-free, dairy-free and nut-free options. I would have had no idea what to tell someone if they asked for those things…and they never did! The experience of going to a restaurant today has changed dramatically and in just 10 years!


    Many children have sensitivities and intolerances to food as well; this is not just a problem for adults. Actually, it seems to me that the younger my client, the more sesitivities they have! (I have a theory about this but won’t get into it here). We learned this lesson very early on with my daughter. When she was 2 she had an eczema rash that wouldn’t go away for months. Once the lightbulb finally went off and I put her on an elimination diet, we quickly discovered gluten and dairy were the culprits. Within 2 days the rash was gone after removing those foods.


    When you ingest food to which you are intolerant, the body releases histamines into the bloodstream, causing inflammation. If the body thinks it is under constant attack, then we start to feel sluggish and may experience other health issues including candida, digestive issues, or blood sugar imbalances.


    An elimination diet starts with the premise that everybody is different, and as such, there is no one-size-fits-all diet. What works for you may not work for someone else, and vice versa. One person might thrive on grains, for example while they make another person drag.


    Food allergy tests are pricey and are not always reliable, as intolerances shift over time. When my clients test their food sensitivities while their gut is still compromised, their tests often show they are sensitive to EVERYTHING! If we retest after a few months of gut healing it seems to me that at that point we are actually seeing the foods they are sensitive to, instead of a list of the whole grocery store. The most inexpensive and accurate way to determine various foods’ effects on you is to do an elimination diet, in which you eliminate common allergens and add them back in one by one to determine your reaction.


    You can hear more about Chris Kresser’s opinion on the accuracy of food intolerance tests here.


    We all have one or many foods that may be wreaking havoc on our system, but if we’re eating several of the main culprits (wheat, eggs, dairy, corn, soy, sugar, and caffeine), it’s hard to tell exactly what’s triggering the reaction. Sometimes symptoms of intolerance manifest themselves immediately upon eating food, but other times there is a delayed reaction, further complicating matters.


    Using a food diary will allow you to systematically and objectively track your physical and emotional reactions to each meal and determine exactly which foods suit you or not. Ironically, it’s often the foods we crave the most that are harming us.


    You will be amazed how great you feel when you eliminate your personal culprits from your diet. And the great news is you can use the same technique of the elimination diet if you ever feel tired or have health issues in the future.


    Here are the basics. I suggest you remove the list below:

    • Remove the foods that people are most commonly sensitive to as well as foods that are hard on digestion. Ideally you will remove these foods for 3 weeks (this would be ideal if you are dealing with multiple health complaints, autoimmune conditions or severe gut dysfunction) but during the seasonal detoxes that I offer we are only strictly removing the whole list for 1 week. Most people can tell when a foods does not agree with them after eating so cleanly for only 1 week. I also suggest that you remove additives, artificial ingredients, sugar and caffeine. By removing these items you will have a very clean slate to reintroduce foods and see how you feel.

    Foods to remove

    • Coffee
    • Sweeteners (white sugar, brown sugar, corn syrup, agave or cane juice
    • Eggs
    • Sugar alcohols (often found in chewing gum, like xylitol)
    • Soy milk
    • Yeast
    • Nuts
    • Alcohol
    • Dairy products
    • Corn
    • Cheese
    • Gluten
    • Grains (only low-glycemic grains, soaked, allowed)
    • Soy (except miso)
    • Processed foods
    • Soft drinks
    • Nitrates
    • Artificial sweeteners
    • Potatoes (except for sweet potatoes or yams)
    • Beans (except for lentils, mung, and adzuki)


    • Reintroduce slowly and systematically. The most common food sensitivities are to gluten, dairy, soy, corn and eggs. These are good foods to start with and to watch carefully for reactions (if any of these foods are already removed from your diet than there is no need to add them back in).


    • Every 2-4 days, add back in foods that are common allergens or hard to digest, giving you the opportunity to see how your body reacts after you have cleansed for at least 7 days.


    • Be conscious of how you feel emotionally and physically when you consume food you have not eaten for at least 7 days and take the time to write this down. A journal is really important for this process!


    Watch out for any of these signs when adding food back into your diet. These signs can signify a food intolerance:


    • White coating on the tongue
    • Acid reflux or heartburn
    • Bad breath
    • Constipation
    • Foul-smelling stool
    • Headaches or migraines
    • Joint pain
    • Sinus issues
    • Clogged ears
    • Rashes or hives
    • Fatigue
    • Poor sleep
    • Water retention
    • Gas and bloating
    • Dry eyes
    • Weight gain or weight loss
    • Racing heart
    • Bags under the eyes
    • Food cravings, sugar or salt
    • Canker sores or a sore tongue
    • Difficulty breathing or cough
    • Poor concentration
    • Swelling of hands/feet


    This is your opportunity to see what fuels your unique body. I always suggest that you first test the food you most suspect is giving you a problem, often the foods that we can’t live without! Note how your body feels in your food diary during this process.


    By eliminating the foods from your diet that you are sensitive to, you may notice great improvements in your health without expensive tests! And this process can be used to check back in anytime in the future if you are not feeling your best. You can be a true health detective!!


    Is this overwhelming?


    If you feel like you wouldn’t know where to start or would have a hard time sticking to these changes, you can join one of our group seasonal online detoxes!!! The group follows a basic elimination diet over 18 days and you will be provided with recipes, what to eat, what to add back in, daily detox tools , daily emails and an amazing Facebook group for support.


    Join us!

    collage

  • How to Dry Skin Brush

    How to Dry Skin Brush


    This is one of the first and easiest additions that I have my clients and detoxers add to their daily routine. This also turns out to be one of their favorites!


    What is the largest organ in the human body and releases over a third of toxins in our body? That’s right! It is our skin. Dry skin brushing is an effective daily practice to help the body detox and remove these harmful toxins, not to mention it opens and unclogs our pores.


    Unlike our blood which gets pumped around the body by your heart, the lymphatic system counts on our movement to stay moving.  And guess what?  Many of us aren’t moving as much as we used to.  Who else is tied to a chair at a desk for the majority of the day? When we dry skin brush, we are massaging and helping our lymphatic system cleanse itself. We pull waste from the body as well as remove any lingering toxins from soap, environmental factors, lotions, deodorant, and other things to help improve skin health.


    The best part is that skin brushing should only take about 5 minutes per day, so it is easily fit into a busy lifestyle and has great benefits! I personally was able to completely remove the bumpy skin that lived on my thighs and the back of my arms after a month of consistently dry skin brushing. Some of the benefits include:

    • Exfoliation
    • Lymphatic system stimulation
    • Reduce or eliminate cellulite
    • Unclog pores
    • Invigorating; you may feel more energized after brushing


    Here are ten simple steps and tips for you to follow to help you get started with dry skin brushing:

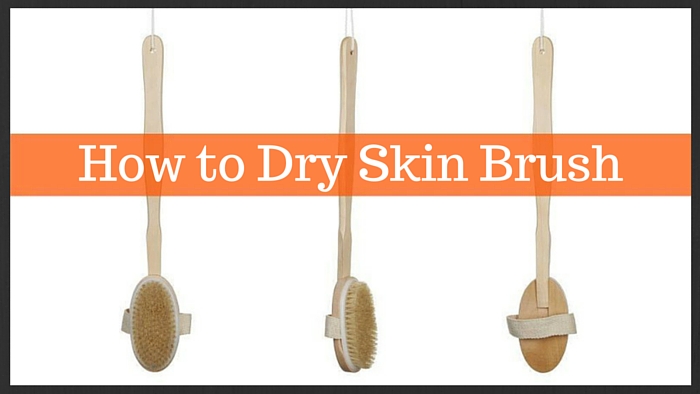
    1. Get a long-handled, non-synthetic bristle brush.
    2. Remove your clothes and stand in the bathtub or on a tiled surface. You will want to do this because you are scraping off dead skin, so you don’t want that to get on your carpet or your rugs.
    3. All of your brushing motions should be heart-centered, meaning you will want to have all the motions be moving towards your heart.
    4. Start at your feet and use long flowing motions, again, towards your heart.
    5. You will want to brush several times in the same area, overlapping your strokes as you continue.
    6. For sensitive skin areas, you will want to go easy. Your skin in those areas should become less sensitive with time.
    7. Once you have your whole body brushed, hop into the tub or shower. I find that the benefits of an Epsom salt bath are heightened after dry brushing.
    8. Alternating cold and hot temperatures help bring the blood back to the top of the skin.
    9. Continue this practice daily, but for best results, consider dry brushing twice a day; once in the morning and once before bed.
    10. Remember to clean your brush at least once per week with soap and water.


    Although this seems like a very simple daily detox tools, some detoxers report having detox reactions such as headaches just from dry skin brushing.  If you know that your liver and lymphatic system are burdened than start slowly.


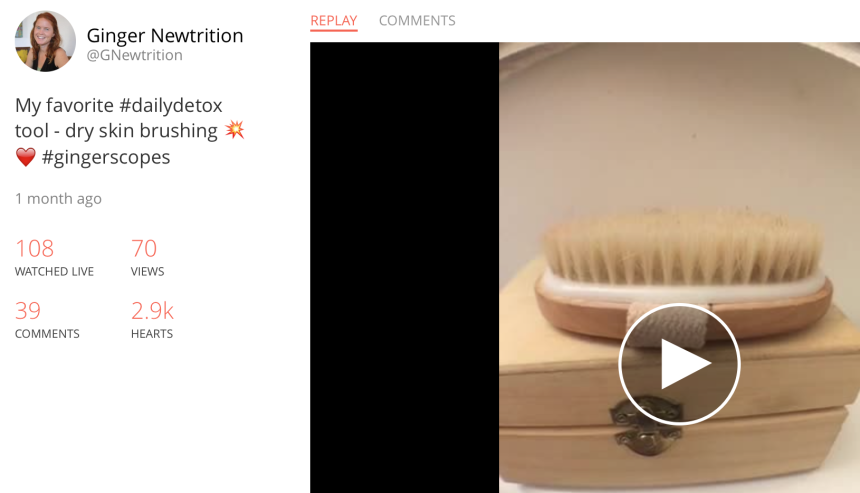
    Watch this periscope replay if you want more of a visual!

    Screen Shot 2015-10-02 at 9.36.44 AM

    Want to learn more of my favorite tips and have a group for support?  Join our next seasonal detox here!!


    What is your favorite daily detox tool?  Leave us a comment below!!


  • Your Brain and Stress; Neurotransmitter Basics

    Your Brain and Stress; Neurotransmitter Basics


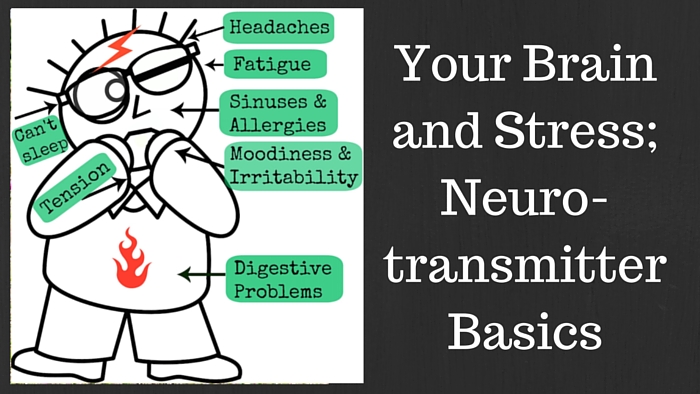
    Many people are becoming aware of the term adrenal fatigue and are starting to suspect that this might be something they are dealing with. But this term can be misleading, because more often that not, it is not as simple as supporting the adrenals to have your fatigue, inflammation and hormonal imbalances disappear. The adrenals gland themselves are often working just fine, but the communication channels and feedback loops might have become disrupted. Neurotransmitters are chemical messengers that deliver important and vital messages from the brain and the adrenal gland. These tiny messengers help you respond to stressors and if they become imbalanced, all sorts of symptoms will start to pop up because the correct messages are not being sent. Once I started looking at a neurotransmitter panel in conjunction with an adrenal/hormone panel, I saw a big shift for my clients. The combination of their hormone and neurotransmitter results helps to put the puzzle together as to where the breakdown is in the chain.

    What happens with our neurotransmitters during stress?

    In time of acute stress or when you are in a constant chronic state of low stress (not just mental/emotional stress but also hidden internal stressors such as food sensitivities, bacterial overgrowth or heavy metal toxicity) neurotransmitters can become depleted. Just having a thought or being scared will alert your brain to alter hormone and neurotransmitter production in response. The neurotransmitters are a part of the stress response cascade. Think about how often we are bombarded with negative imagery and high stress situations in our fast-paced lifestyle. By looking at the levels of different neurotransmitters as well as their relationship to each other, such as the ratio between serotonin and dopamine or norepinephrine and epinephrine, we can see how well your body is adapting to stress.

    We have both excitatory and inhibitory neurotransmitters and some play both roles depending on the situation. Since our body likes to remain in balance, we also function optimally when our excitatory and inhibitory neurotransmitters are balanced. For example, stimulants such as caffeine push dopamine into the synapse and dopamine acts as an excitatory agent, which improves our focus. You know how you have your coffee and then feel pretty productive for a while? Feeling productive is great except there is a price we pay for that focus. Your body must now send in some inhibitory neurotransmitters to reign in the excitatory neurotransmitters. Serotonin and GABA come to the rescue. This is not necessarily a problem, because this is one of the ways that our amazing body stays balanced, but when we abuse ourselves daily by artificially forcing productivity with excess caffeine consumption, we eventually end up depleted in serotonin and GABA. Among many other functions serotonin is important for a stable mood and GABA is nature’s valium-like substance, you can see where we end up without these precious resources. You always have to ask… is this short-term benefit of being able to focus and have energy worth the long-term risk of an instable mood?

    Here is an example of the neurotransmitter testing results that the Healthy Hormones Group Program will have access to. These are just clues to get an idea of the bigger picture because your neurotransmitter levels will change throughout the day. Testing and then retesting after a period of time after trying a protocol or therapy will help us to understand how your body is reacting.

    [image url=”http://gingernewtrition.com/wp-content/uploads/2015/09/Screen-Shot-2015-09-02-at-1.46.39-PM1-860×664.png” raw=”true” alignment=”center” margin_left=”0″ margin_right=”0″ margin_top=”0″ margin_bottom=”0″ width=”860″ height=”664″]

    Here is a quick explanation of the neurotransmitters that we will be looking at during the next Healthy Hormones group program:

    Serotonin – This is considered the master neurotransmitter and helps to keep balance between the excitatory and inhibitory neurotransmitters. Adequate levels is necessary for a stable mood.

    Dopamine – Key player in reward-seeking type of behavior such as pleasure, satisfaction and focus. Dopamine also influences muscle control and gastrointestinal motility. Really low or high dopamine levels is correlated with memory issues.

    Norepinephrine– Important to the fight-or-flight response and also helps to make epinephrine.

    Epinephrine– Also known as adrenaline which we all know well. Epinephrine prepares the body for fight-or-flight by increasing your heart rate, blood pressure and respiratory rate so that you can run away or fight off the danger. This will also elevate your ACTH which raises your cortisol

    GABA– Nature’s valium-like substance which also helps regulate muscle tone.

    Glutamate– Important for memory and learning but can be damaging in excess leading to depression, seizures and damaging nervous tissue. This is often seen high for those with PTSD but you also have to watch that you are not accidentally consuming glutamate from MSG or DSG sources in food.

    Histamine – Helps to control sleep-wake cycle, energy production and memory recall. This reading on your lab is a window into inflammation and the higher the number the more mental fogginess, allergy symptoms and irritability you might be experiencing.


    If your neurotransmitters are all trending low in conjunction with low cortisol levels, than this is a sign you are in a chronic state of stress and are now in the tired and “burnt-out” phase.  At this point you will need a good amount of support to return to a healthy level.

    Ready to find out what is going on at a sub-clinical level before symptoms occur? Ready to get to the root of why you can’t seem to kick the anxiety or get your energy back? Come join us for the Healthy Hormones Group Program!!

  • Hormone Helping Coconut Chips

    Hormone Helping Coconut Chips


    As Alex of Dig Primal and I have been working on the content for our Healthy Hormones Group Program for the last few months, my favorite part of the process is that I get to learn the tips and tricks that she uses too! We all have different tools that we pick up along the way and I think that it is important to have a really varied toolbox for my clients. Each person that I work with is so uniquely different in their bio-individual and genetic makeup that often a suggestion that works amazingly for one person will leave another feeling sick. A supplement that gives me energy though the roof might cause you to fall asleep at your desk. That is all a part of the puzzle!! I love learning lots of different options, recipes and suggestions so that we can find the perfect combination for each person.


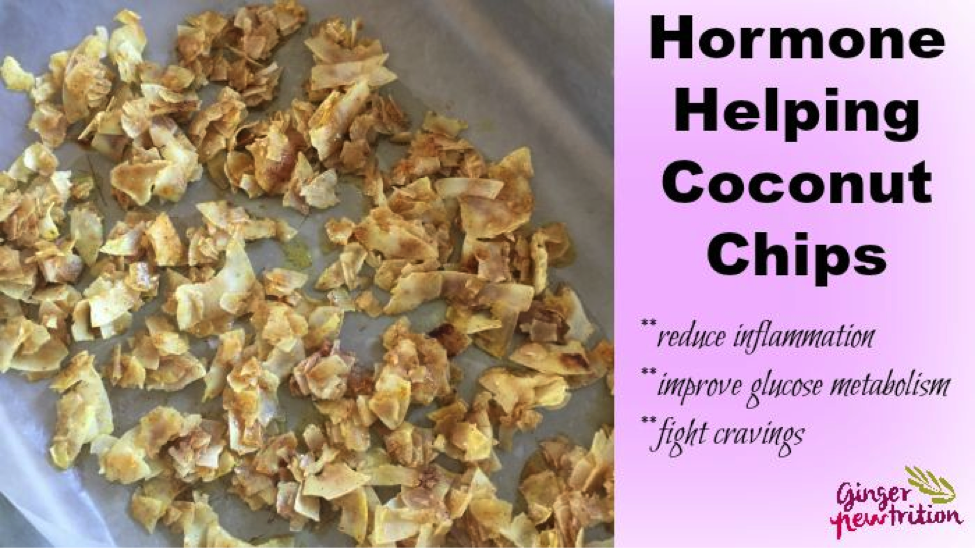
    Alex shared this recipe with me for Hormone Helping Coconut Chips and I can’t get enough! I love incorporating coconut flakes into my diet for a lot of reasons. For one, they have an amazing composition of healthy fats, protein, and fiber. Not only does this combination of macronutrients help keep you full longer after meals (which also helps prevent unhealthy snacking you weren’t actually intending), but fueling your body with such balanced caloric intake is great for the hormonal system. Additionally, the fatty acids found in coconut products directly play a role in healthy hormone synthesis so their presence in the diet greatly increases the success of all your other hormone-helping interventions; after all, it makes sense that if you don’t have the building blocks to create hormones, no amount of adjunctive therapies are going to help your cause in the long term.


    The spices found in this recipe work through a variety of mechanisms to help the endocrine and adrenal system along. Since glucose metabolism is a huge problem in people with hypothalamic-pituitary-adrenal dysfunction (which is often simply referred to as “adrenal fatigue” but is actually an incredibly limited way to look at the problem since it encompasses so much more than the adrenals…no wonder people have a hard time treating it on their own!), the cayenne, turmeric, and cinnamon are in here to help with the proper use and balance of sugar in the body.


    As an added bonus, cayenne pepper and turmeric are incredibly effective in tempering the inflammatory response in the body due to stress, high glucose levels, and underlying hormonal imbalances (see how they all work off each other??), incorporating these spices into meals regularly can be really helpful.


    Ingredients:


    • 2 cups coconut flakes
    • ¼ teaspoon cayenne pepper
    • ¼ teaspoon ground turmeric
    • ½ teaspoon ground cinnamon
    • ½ teaspoon vanilla extract
    • 1 tablespoon ghee (replace with coconut oil if you can’t tolerate dairy products)
    • 5 tablespoons raw honey


    Steps:


    1. Preheat your oven to 300 degrees.
    2. Place your coconut flakes into a medium-sized mixing bowl.
    3. Add in the cayenne pepper, ground turmeric, and ground cinnamon to the coconut flakes and stir well so that all the spices are well distributed (trust me when I say that you do not want a big bite of cayenne pepper down the line).
    4. Place the tablespoon of ghee (or coconut oil) into a small bowl and microwave it until the ghee has melted.
    5. Add the honey and vanilla extract to your melted ghee and mix them all together.
    6. Slowly pour your honey, ghee, and vanilla extract mixture of the spice-dusted coconut flakes. Mix it all together until everything is evenly distributed.
    7. Line a baking sheet with wax paper and evenly spread your coconut flake mixture over the entire area. You don’t want big clumps so take a few moments to spread it all out over the entire baking sheet.
    8. Bake in the oven for 5-7 minutes.
    9. Take out and let cool.
    10. I stored mine in a glass tupperware container.


    Want to learn more fun and delicious recipes that can also help support your adrenal glands and balance hormone? The Healthy Hormones Group Program is starting Sept 15th!!!


    [image url=”http://gingernewtrition.com/wp-content/uploads/2015/08/Healthy-Hormones-Group-Program-Logo.png” raw=”true” alignment=”center” margin_left=”0″ margin_right=”0″ margin_top=”0″ margin_bottom=”0″ width=”244″ height=”103″]


  • My Favorite Uses for Lemon, Lavender & Peppermint Essential Oils

    My Favorite Uses for Lemon, Lavender & Peppermint Essential Oils


    I started using doTERRA essential oils a few months ago and still continue to be amazed at the number of applications that they have. The Intro Kit, around $26, includes Lemon, Lavender & Peppermint. By far, these are the 3 oils that I use the most.


    The essential oils were a savior during our cross country road trip from San Diego to NH. With a 3 yr old in tow, you never know what you might get into! They came in handy for bug bites, sunburns, clogged sinuses and to make lemon water on the go.


    Here are my favorite uses for the basics trio:

    [image url=”http://gingernewtrition.com/wp-content/uploads/2014/09/Trio.png” raw=”true” alignment=”center” margin_left=”0″ margin_right=”0″ margin_top=”0″ margin_bottom=”0″ width=”476″ height=”400″]

    Lemon


    Warm Lemon Water in the morning. When traveling, carrying a bag of lemons for your morning lemon water is pretty darn inconvenient. Although inconvenient, this is often when we need to support our liver and digestion the most.  Add 1-2 drops of Lemon oil to warm water in the morning.

    Eradicate Undesirable Smells. Wish your bedroom didn’t smell like the salmon you made for dinner last night? Diffuse Lemon oil to neutralize odors.

    Pick-Me-Up. When you lack motivation or energy, try rubbing a drop of Lemon oil on your hands, the back of your neck or even through your hair. You’ll be amazed at the power of the lemony aroma!

    All-Purpose Cleaner. Mix 5-6 drops Lemon essential oil with water and vinegar in a spray bottle to cleanse and purify surfaces. Use to clean kitchen counters and stainless steel appliances. For stainless steel, mix Lemon essential oil with olive oil for best results.

    Get Rid Of The Sticky Stuff. Lemon essential oil is excellent for removing sticky tree sap, sticker residue and permanent marker. It even gets gum out of hair!

    Super Study Powers. Diffuse with Peppermint in the classroom or during homework time to help the kids stay awake and focused.

    Preserve the Fruit. Use Lemon essential oil in a spray to keep your cut fruit fresh until serving.

    Refresh Bad Smelling Washcloths. When your kitchen washcloths smell foul and could use a boost, add Lemon oil to your detergent, soak overnight, wash, dry and your kitchen will smell so much better!

    Nourish Your Leathers & Furniture. Preserve and prevent leather from splitting with a Lemon oil soaked cloth. Also, a few drops of Lemon essential oil combined with a few drops of olive oil makes a great furniture polish.

    ‘Lemonize’ Your Laundry. Instead of dryer sheets, try adding a few drops of Lemon oil  to a damp washcloth in the dryer with the rest of your laundry. Be sure to set the dryer to a low temperature cycle, as high heat will lessen the effects of the oil.


    Lavender


    Take A Lavender Bath. Drop a few drops of Lavender essential oil along with Epsom salts or magnesium oil to your bath water for an ultra-relaxing experience. This is my favorite use!

    Sleeps Best Friend. Rub on the bottoms of the feet for a more restful sleep. A few drops of Lavender placed on a pillow will help a restless toddler (or adult) fall asleep and stay asleep. (Lily’s requests lavender every night!)

    Bug Bites. Rub Lavender oil on your bugbites in the evening when they start to itch like crazy. This worked really well for my daughter this summer who was eaten alive in NH!

    Quick Fix. Mix three parts fractionated coconut oil with one part Lavender essential oil in a small spray bottle or roll on to help clear up skin irritation associated with chafing. Great for little ones!

    Enjoy A Fresh And Clean Mattress. Sprinkle a mixture of 1 cup baking soda and 10 drops of Lavender essential oil over your mattress. Allow the mixture to sit for at least one hour then use the vacuum hose to clean it up. You can combine with drops of Eucalyptus, Peppermint, Clove, or Rosemary as well.

    Ouch! That’s Hot! The next time someone doesn’t realize the iron or pan is still hot, apply Lavender oil to the affected area to soothe skin irritation, relieve redness and ease swelling.

    Homemade Aftershave. Use after shaving to soothe and soften skin and to lessen the redness and burning caused by razor burn.

    Take the “Ouch” Out. One drop of Lavender will help relieve the pain and sensitivity of occasional sore gums, dry or chapped lips, occasional scrapes and abrasions, or after too much sun.

    Clear The Mind. Apply Lavender to the temples and back of the neck to lessen the effects of stress and anxiety and to promote mental clarity.


    Peppermint


    Stuffed up Sinuses. Dilute a drop of Peppermint oil combined with fractionated coconut oil and place under your nose to support open airways and help you breathe easily.

    Peppermint Smoothies! Peppermint makes a delicious addition to all things chocolate. I add a drop into a cacao nib smoothie and I feel like I am having a mint chocolate chip milkshake. YUM!

    Bad Breath? Use a drop of Peppermint with Lemon in water for a healthy, refreshing mouth rinse.  It freshens breath and builds confidence in your close encounters.

    Take a Deep Breath. Inhale deeply to invigorate lungs and increase alertness.

    Stressed? Apply to neck and forehead with Lavender to relieve tension and pressure.

    A Joint Effort.  Peppermint is a great way to cool joints without taking an ice bath. It helps to soothe occasional soreness in muscles and joints.

    Tummy Calmer. Rub on the stomach or take internally for occasional digestive discomfort.

    Out on the Open Road. Don’t fall asleep at the wheel! Inhale Peppermint from a handkerchief or straight from the bottle to perk up on long drives.

    Approaching Deadlines Mean Long and Late Hours. Rather than grab a Snickers to revitalize you as you ‘go the extra mile’, deeply inhale Peppermint to feel revitalized and ready to go.

    Un-Block Writer’s Block. Peppermint can support blood circulation and leave you feeling rejuvenated to keep those creative juices flowing. Simply spritz peppermint on child’s shirt before study time for improved concentration and alertness.


    What else do you use your essential oils for?  We LOVE learning new tricks.  Share with us!

    Check out all the amazing oils available from doTERRA here.


    Adapted from: http://www.doterraeveryday.com/150physiciankituses/